devonly randomonium

Sugar-coated effery and shenanigans.

Tip Drill

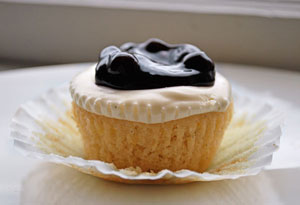
Source: Cupcakes Take The Cake

I received some very nice gifts for Christmas. The majority of the gifts were cash…great for a broke biznatch like moi.  But the one gift that stood out was the big brown bag of baking goodies from my cousin Terea. The average person would not get excited about 31 decorating tips, icing bags, a cupcake corer and a filled cupcake baking pan. When I pulled each of these items out of that beautiful bag with the royal purple ribbon handles, I cried. My Mom couldn’t understand why I was crying. My sister teased me for being über emotional. But it really touched me that my cousin actually listened when I told her about my love of baking. She even gave me a card with words of encouragement. It was also a reminder to not give up on my dream. It gave me hope, and it felt good to know that someone believed in me even when I didn’t believe in myself.

The other day, I had a conversation with my sister from another mother…and father, Amanda. Actually, it was more like an encouragement smack down. You see, I have a bad habit of being slightly irrational. Other people get an idea and they run with it. I get an idea and I always find reasons why it won’t work. I realize that I sabotage myself when I do this. I also know that’s something I have to change. So Amanda fussed me out for about 15 minutes, addressing that in the process. She said, “I think you need to fucking do what you love and stop being so humble! You’re good and you need to believe that.” And she’s right.

Part of me knows that God has blessed me with some talents. But I often downplay them because I don’t want to seem cocky, or like I’m fishing for compliments. I do what I do because I truly enjoy it. And now I just have to learn how to work it and own it.

I’m sure I’ll get there soon. I know it just takes time and a ton of positivity. In the meantime, I can’t wait to use all of my new tools. Watch out now. I’ve got 31 icing tips and I’m not afraid to use ’em!

Leave a comment »

Nom, Nom, Nom: I’ll Crumble For Ya

Sadly, our season four True Blood Supper Club ended on September 11. Finally, us fangers, howlers, witches and potential mediums got a solid season finale. I now have a slight case of separation anxiety because I don’t get to meet up with my girls on Sunday nights. But woo, woo, woo. Don’tcryformeArgentinapointblankperiod.com.

We wanted to go all out for the season finale. We talked about doing a Cajun menu weeks before. But when the night finally rolled around, we decided to go with a considerably lighter menu. That meant chicken Caesar salad and wine of course! At first, I wanted to get all fancy and make a bananas foster creme brulee or chocolate-strawberry crepes. But once the menu changed, I went with a simple fall dessert. I was too lazy to go to the store, so I decided to make an apple crumble. I already had everything I needed to make it. So done and done!

If you’re not a baker, crumbles are right up your alley. They usually require you to plug-in a mixer, chop some fruit and cut in some butter. If you can’t do this, I don’t know what to tell you. (Actually, I’ll just say a prayer, and ask Baby Jesus to give you common sense!) But this recipe I found on About.com is super easy to make, and it will serve about six people.

I decided to tweak this recipe a little, and make mini crumbles in ramekins.  I added about a 1/2 cup of old-fashioned oats to the crumble mixture along with some ginger and nutmeg. I didn’t add water to the apples. Instead, I cut up my apples, seasoned them with cinnamon, nutmeg and dark rum, and added lemon juice to keep them from turning brown. I let my apples chill out in this mixture in the fridge while I made the crumble. Before I assembled the mini crumbles, I added about a tablespoon of potato starch to the apples so the rum and juices would thicken up as the crumbles baked.

I recommend baking the crumble for the full 45 minutes. The crust came out perfect. I also recommend that you have vanilla ice cream and extra mini crumbles on hand. Our hostess for the evening (Dana) really enjoyed the dessert and said, “Damn Devo, you really have a future in this!”

Here’s the recipe:

Ingredients:

  • 4 cups peeled, cored, sliced apples
  • 1/4 cup water
  • 3/4 cup all-purpose flour
  • 1 cup granulated sugar
  • 1 teaspoon ground cinnamon
  • 1/2 teaspoon salt
  • 1/2 cup softened butter

Preparation:

Place apples in a lightly buttered baking pan or dish, about 10 x 6 or 9-inch square. Add water. Combine flour, sugar, cinnamon, and salt. Cut in butter until mixture resembles coarse crumbs. Sprinkle crumb mixture over the apples. Bake apple crunch at 350° for 35 to 45 minutes, or until apples are tender. Serve apple crumble warm with ice cream, if desired.

Apple crumble serves 6.


So happy chopping, baking and crumble making!

Leave a comment »

Nom, Nom, Nom: Vanilla Nice

Thanks to our True Blood Supper Club, I’ve been spending even more time in my kitchen.

Am I sad?

Nope.

I look forward to spending Sundays with my friends, and tasting the dishes they prepare for our gatherings. I’ve hosted two Supper Club nights so far, and it’s been  fun planning the menus. I’ve especially enjoyed making the desserts.

When you bake a lot, you never really pay attention to ingredients that you use on a regular basis. Well, that’s been my experience for the most part. You know you’re going to crack a few eggs, cream some butter and dump in some sugar. That’s usually the holy trinity of baking. But lately, I’ve been paying more and more attention to vanilla beans and vanilla extract. I used to just buy imitation vanilla extract because that’s what I grew up on. It was much cheaper, and you got more in the bottle. But I stopped being cheap and started using the real deal.  And I’m glad I did.

I made two desserts recently that really put vanilla in the spotlight. One dessert was peach and vanilla puff pastry pies, and the other was a grownup version of cookies and milk. I found the peach and vanilla puff pastry pie recipe in the August issue of the gospel according to O.  And the “milk” in the grownup cookies and milk combo was actually a spiked vanilla milkshake. I found that recipe on 20something cupcakes. Both of these recipes were simple, and the end results were crowd pleasers.

Here are the recipes:

Peach and Vanilla Puff Pastry Pies

Serves 8

Source: O Magazine

1 vanilla bean pod, halved lengthwise
3 large peaches (about 1 pound), peeled, pitted, and cut into 1/2″ chunks
1/4 cup sugar
1 Tbsp. cornstarch
1 tsp. vanilla extract
2 (9″ x 16″) pieces frozen puff pastry, thawed but still very cold

Directions
Active time: 30 minutes
Total time: 1 hour

Preheat oven to 400°. Run a paring knife down the cut sides of the vanilla bean to remove the vanilla seeds, and transfer to a large bowl. (Discard vanilla bean pod, or save for another use.) Add peaches, sugar, cornstarch, and vanilla extract and toss until well combined; set aside.

Working on a sheet of parchment paper, cut 1 piece of puff pastry in half, and then roll each half into a 10-inch square. Using a bowl, glass, or cookie cutter, cut 4 (4 1/2″) circles out of each half. Use the circles to line the cups of 8 muffin tins, positioning them to form little pie shells or baskets. Save any remaining dough scraps to re-roll and use for step 4, as needed.

Spoon peach mixture evenly into the muffin cups lined with the puff pastry shells; set aside.

Arrange remaining pastry on a sheet of parchment paper and cut out 8 circles, approximately 3 inches in diameter. Place 1 on top of each muffin cup, folding the edges of the bottom pastry over the top and pinching tightly to seal each pie.

Bake until pies are puffed and deep golden brown, 25 to 35 minutes. Carefully run a paring knife around the edges of each pie and immediately transfer to a platter. Serve warm or at room temperature.

My Thoughts

This recipe was fairly easy to make. I decided to use turbinado sugar instead of regular sugar. I also used a combination of white and yellow peaches for the filling, and added about a tablespoon of dark rum to the mixture. The pies turned out well, and I served them warm with a scoop of vanilla ice cream. I suggest that if you try this recipe, cut the baking time down to 25 minutes or so. I baked them for 35 minutes and they were a little browner than I wanted them to be. I baked another batch of these the next day, and found that they were perfectly golden brown at 25-28 minutes. Also, make sure you keep your puff pastry ice-cold. It’s hard to work with when it’s at room temperature, so if you find that it’s sticky and hard to roll out, pop it back in the fridge for a few minutes. It should be good to go!


Vanilla Milkshakes

For the Milkshakes:

4 cups of good vanilla ice cream
1/2 cup whole milk
1/4 cup heavy cream
2 teaspoons vanilla extract

Assorted Spikers:

Grand Marnier
Jim Beam, or other Bourbon whiskey
Kahlua
Bailey’s Irish Cream

In a blender, combine all milkshake ingredients until smooth. For thicker milkshakes, add less milk. For thinner shakes, simply add more milk.

My Thoughts

You probably think that making a milkshake is not rocket science, and you would be correct. But I’ve had some pretty disappointing shakes over the years. Some were watery, others were like a milk Icee and some tasted really artificial. This is a very solid milkshake recipe. It’s creamy, super delicious and very grownup. I didn’t use an expensive ice cream either. I used some French vanilla ice cream from Aldi. And I spiked the milkshakes with dark rum. The rum really complimented the vanilla. I served the shakes in chilled martini glasses and garnished them with some freshly ground nutmeg.

Yummay!


Leave a comment »

Nom, Nom, Nom: Red Velvet Cupcake Smackdown


Lately I’ve been seeing red in my kitchen. For the last few weeks, I’ve been experimenting with red velvet cupcake recipes. I tried the Buttah Queen’s (Paula Deen’s) recipe, and a recipe from the Joy of Baking (JOB). Now I thought that I would automatically like Paula’s recipe because she doesn’t hold back on the sugar and fat. I was wrong. I actually liked the JOB recipe better.

Here are the two recipes:

Paula Deen’s Red Velvet Cupcakes with Cream Cheese Icing

2 1/2 cups all-purpose flour
1 1/2 cups sugar
1 teaspoon baking soda
1 teaspoon salt
1 teaspoon cocoa powder
1 1/2 cups vegetable oil
1 cup buttermilk, room temperature
2 large eggs, room temperature
2 tablespoons red food coloring
1 teaspoon white distilled vinegar
1 teaspoon vanilla extract

For the Cream Cheese Frosting:

1 pound cream cheese, softened
2 sticks butter, softened
1 teaspoon vanilla extract
4 cups sifted confectioners’ sugar

Chopped pecans and fresh raspberries or strawberries, for garnish

Directions

Preheat the oven to 350 degrees F. Line 2 (12-cup) muffin pans with cupcake papers.

In a medium mixing bowl, sift together the flour, sugar, baking soda, salt, and cocoa powder. In a large bowl gently beat together the oil, buttermilk, eggs, food coloring, vinegar, and vanilla with a handheld electric mixer. Add the sifted dry ingredients to the wet and mix until smooth and thoroughly combined.

Divide the batter evenly among the cupcake tins about 2/3 filled. Bake in oven for about 20 to 22 minutes, turning the pans once, half way through. Test the cupcakes with a toothpick for doneness. Remove from oven and cool completely before frosting.

For the Cream Cheese Frosting:

In a large mixing bowl, beat the cream cheese, butter and vanilla together until smooth. Add the sugar and on low speed, beat until incorporated. Increase the speed to high and mix until very light and fluffy.

Garnish with chopped pecans and a fresh raspberry or strawberry.

_______________________________________________

Joy of Baking Red Velvet Cupcakes

1 1/4 cups (125 grams) sifted cake flour
1/4 teaspoon baking powder
1/4 teaspoon salt
1 tablespoons (10 grams) regular unsweetened or Dutch-processed cocoa powder
1/4 cup (57 grams) unsalted butter, at room temperature
3/4 cups (150 grams) granulated white sugar
1 large egg
1/2 teaspoon pure vanilla extract
1/2 cup (120 ml) buttermilk
1 tablespoon liquid red food coloring
1/2 teaspoon white distilled vinegar
1/2 teaspoon baking soda

Cream Cheese Frosting:

8 ounces (227 grams) cream cheese, room temperature
1/2 teaspoon pure vanilla extract
1/2 cup (60 grams) confectioners’ (icing or powdered) sugar, sifted
2/3 cup (160 ml) cold heavy whipping cream (35-40% butterfat content)

Preheat oven to 350 degrees F (175 degrees C) and line 12 muffin tins with paper cupcake liners.

In a large bowl whisk or sift together the flour, baking powder, salt, and cocoa powder.

In the bowl of your electric mixer, or with a hand mixer, beat the butter until soft (about 1-2 minutes). Add the sugar and beat until light and fluffy (about 2-3 minutes). Add the egg and beat until incorporated. Scrape down the sides of the bowl. Add the vanilla extract and beat until combined.

In a measuring cup whisk the buttermilk with the red food coloring. With the mixer on low speed, alternately add the flour mixture and buttermilk to the butter mixture, in three additions, beginning and ending with the flour.

In a small cup combine the vinegar and baking soda. Allow the mixture to fizz and then quickly fold into the cake batter.

Working quickly, divide the batter evenly among the 12  muffin cups and smooth the tops with an offset spatula or the back of a spoon. Bake in the preheated oven for approximately 18 – 23 minutes, or until a toothpick inserted in the center of the cupcakes comes out clean.

Cool the cakes in their pans on a wire rack for 10 minutes and them remove from pan. Let cool completely before frosting. Either spread the frosting with a knife or offset spatula, or use a large 1M Wilton open star decorating tip to pipe the frosting.

Cream Cheese Frosting: In the bowl of your electric mixer, or with a hand mixer, beat the cream cheese until smooth. Add the vanilla and confectioners sugar and beat until smooth. Using the whisk attachment, gradually add the heavy cream and whip until the frosting is thick enough to pipe. Add more sugar or cream as needed to get the right consistency.

Makes 12 cupcakes.

____________________________________________________

Even though the recipes are quite similar, I liked JOB’s better. The only thing I liked about the Buttah Queen’s recipe was the icing.

I need this mug in my life.

With Paula Deen’s recipe, the cupcakes were kind of greasy and reminded me more of a corn muffin or something. To me, the vegetable oil was a bad call. I think I would just use butter or way less oil if I ever use this recipe again. If you want to take a stab at it, I recommend baking these for 18 minutes instead of 20. If you go over 20, they might be dry and hard from all of the oil. I also recommend adding a tablespoon or two of cocoa powder instead of 1 teaspoon so you can actually taste the chocolate.

With JOB’s recipe, the cupcakes were lighter and fluffier. They didn’t taste greasy and they weren’t too sweet. I didn’t make the whipped cream, cream cheese icing for these because Paula Deen’s icing was almost orgasmic…no joke! C’mon, butter + cream cheese + powdered sugar = automatic win! But the whipped cream, cream cheese icing would work too if you want a much lighter icing. I also recommend baking these between 18-19 minutes. I baked them for 20 minutes, and even though they weren’t dry, they weren’t as moist as I wanted them to be.

Despite my criticisms, my friends enjoyed both versions. But I’m going to keep tweaking things until I get this recipe just right!

Leave a comment »

Nom, Nom, Nom: Blueberry Yogurt Cupcakes

If you don’t know by now, I love to bake.

It’s funny because when I was younger, I hated being in the kitchen. I didn’t have the patience to make pound cakes, sweet potato pies or truckloads of Christmas cookies. On the other hand, my sister loved it. She would sing cheerfully and hum while icing cookies or filling pies. All I wanted to do is go outside and find weird bugs or play video games.

As I got older, I started to appreciate baking. It was fun. It usually involved as Paula Deen would say, “buttah” and sugar, and it became a release after a stressful day. So now I try to bake whenever I can.

Alrighty then. Time for today’s recipe. This recipe comes from the May 2011 issue of O almighty’s magazine (The Oprah Magazine).  This Blueberry Yogurt Cupcake recipe was featured in an article called Cooking Up Friendships by Howie Kahn. Cooking Up Friendships is about a group of food bloggers, brought together by the recipes of food writer and cookbook author, Dorie Greenspan. You can read the full article here.

This recipe is a fruit-inspired twist on Dorie Greenspan’s French yogurt cake created by French Fridays with Dorie member Joel Brown.

Blueberry Yogurt Cupcake Recipe

Serves 12

blueberry yogurt cupcakes

Source: Oprah.com

Ingredients

1 cup all-purpose flour
1/2 cup ground almonds (or, if you’d prefer, omit and use another 1/2   cup all-purpose flour)
2 tsp. baking powder
1/4 tsp. salt
1 1/4 cups sugar, divided
Grated zest of 2 lemons, divided
3 large eggs
1 1/4 tsp. pure vanilla extract, divided
1/2 cup canola oil
1 package unflavored gelatin, bloomed according to directions
1 (16-ounce) can blueberry pie filling

Directions
Active time: 30 minutes
Total time: About 45 minutes

Center a rack in the oven and preheat the oven to 350°. Generously butter a cupcake tin and place it on a baking sheet.

Whisk together the flour, ground almonds (if using), baking powder, and salt.

Put 1 cup sugar and zest of 1 lemon in a medium bowl and, with your fingertips, rub the zest into the sugar. Add 1/2 cup yogurt, eggs, and 1/4; tsp. vanilla and whisk until the mixture is well blended. Whisk in the dry ingredients. Fold in the oil. Pour batter into cupcake tin, filling cups about 2/3 of the way.

Bake for 18 to 20 minutes, or until the cupcakes begin to come away from the sides of pan; they should be golden brown, and a thin knife inserted in the center should come out clean. Transfer the pan to a rack and cool for 5 minutes, then run a butter knife between the cupcakes and the sides of the pan. Turn out cupcakes and cool to room temperature.

To make the glaze: In a medium bowl, mix together 1/4; cup sugar, zest of 1 lemon, 1 tsp. vanilla, 2 cups Greek yogurt, and gelatin. Spoon over cupcakes and chill. Top each with a spoonful of pie filling.

Adapted by Joel Brown from Dorie Greenspan’s French yogurt cake with marmalade glaze in Baking: From My Home to Yours (Houghton Mifflin Harcourt, 2006)

Leave a comment »

Me and Mr. Banana Legs Part Three: Whipped to Perfection

Last month, I told you all about my adventures with the Mr. Banana Legs cake. Ok, I’ll admit that the Italian Meringue Buttercream icing made me its byotch. But I’m proud to announce that after 12 over-ripened bananas, six boxes of  extra-fine sugar and half of a bottle of Bacardi Select, I’ve finally nailed this cake.

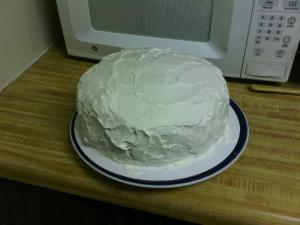
Mr. Banana Legs

The cake was not hard to make at all. The recipe was super easy to follow, the ingredients weren’t hard to find and the end result is worth the effort. But I was not crazy about the Italian Meringue Buttercream icing. The first time I made it, the flavor was not good. After chilling the cake, the icing solidified and tasted like a stick of butter that was soaked in rum and sugar. The second time I made the icing, it tasted a little better but the consistency was still bad. It was like the icing had curdled or something.  When I look back on the process, I realize that it’s probably better to make the icing with a standing mixer.

Why?

Take a look at the recipe and I’ll break it down in a minute:

Italian Meringue Buttercream

From cakelove: How to Bake Cakes from Scratch by Warren Brown

Ingredients

egg whites (large), 5

extra-fine granulated sugar, 10 ounces (1 1/4 cups)

cold water, 1/4 cup

unsalted butter (room temperature), 1 pound (4 sticks)

1. Separate the egg whites into the bowl of a standing mixer fitted with the wire whip attachment.

  • Measure 1 cup sugar and the water into a 1-quart, heavy-bottomed sauce pan. Gently stir to combine.
  • Measure the remaining 1/4 cup sugar into a small bowl and set aside.
  • Cut the butter into tablespoon-sized pieces and set aside in a medium bowl.

2. To make the sugar syrup, place a candy thermometer in the saucepan and heat the mixture over medium-high heat. Partially cover with a lid to capture the evaporating water-this helps to moisten the sides of the saucepan to prevent sugar crystals from forming.

3. With the mixer on high speed, begin whipping the egg whites to stiff peaks. When the peaks are stiff, you have a meringue.

4. Keep the mixer running and pour the 1/4 cup of sugar into the meringue.

5. Raise the heat under the sugar syrup to bring the syrup to 245 degrees Fahrenheit. When the syrup is at 245 degrees, remove the thermometer and slowly pour the syrup into the meringue.

6. After 1 to 2 minutes, reduce the mixer speed to medium for 3 to 4 minutes, or until the meringue is cooled. Add the butter 1 tablespoon at a time. Increase the mixer speed to high for 1 to 2 minutes, or until the butter is fully incorporated.

Here’s where I screwed up.

I have a hand mixer and it actually works for this recipe up until step six.  When I started adding all of the cubes of butter, the icing falls apart. I realized that this was due to me over mixing it. With a standing mixer, you can add one cube of butter after another  and each cube will be fully incorporated. So with a standing mixer, step six can be completed in eight minutes or less. With the hand mixer, I probably got close to the 10-15 minute mark and my icing started to turn into butter again.

Here’s where I redeemed myself.

This time, I decided to be less ambitious. I also wanted to make a lighter icing. Even if I nailed the Italian Meringue Buttercream, it would have been too sweet and rich for the cake. So I did some research and decided to go with a whipped cream icing. But not just any whipped cream icing would do. No, I needed one that would hold up for more than just a day. So I found a great recipe for a sturdy whipped cream icing  on AllRecipes.com. Here it is:

Ingredients

  • 1 (8 ounce) package reduced-fat cream cheese, softened
  • 1/2 cup white sugar
  • 1 teaspoon vanilla extract
  • 1/2 teaspoon almond extract
  • 2 cups heavy cream
  1. Combine the cream cheese, sugar, vanilla extract and almond extract in a large mixing bowl or the bowl of a stand mixer. Fit the mixer with the whisk attachment and mix on medium speed until smooth. While the mixture is still whipping, slowly pour in the heavy cream. Stop and scrape the bottom of the bowl a couple of times while you continue whipping until the cream can hold a stiff peak.

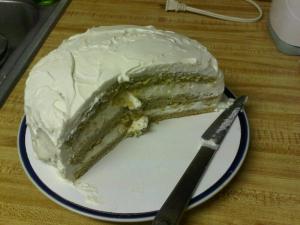
Mr. Banana Legs Cake sliced

How simple is that! And it takes less than 10 minutes to make. I recommend not letting the cream cheese come to room temperature, or putting it in the microwave before mixing it with the sugar. Just mix it right out of the fridge. Also, use a metal bowl and pop it in the freezer to get it really cold. To keep it cold, I sat my bowl in an ice water bath while mixing the ingredients together.  And since I’m not a fan of almond extract, I just left it out. The texture is light and fluffy, and the icing tastes great. It’s a perfect match for Mr. Banana Legs.

So I delivered some slices to my friend this evening. I just hope she likes it as much as we do!


Leave a comment »

Me and Mr. Banana Legs Part Two: Meringue Madness


Source: 2Kad Blog

Last week, I challenged myself to make the Mr. Banana Legs cake from the CakeLove cookbook. How did it go? Well the experience was not entirely bad. I think I was just super nervous about making a cake from scratch. I don’t know why because I’ve made a number of things from scratch before with no problems. But to me, cakes are more delicate than brownies, bars and cookies. It seems like one mistake could make them fall or ruin how moist they are. Who knows. Maybe I’m just paranoid from all of the years of watching my Mom fret over her pound cakes.

Making the cakes was a breeze. They baked up well and were super easy to split for the filling. The problem was the Italian Meringue Buttercream icing. The buttercream I make for my cookies is simple and takes a few minutes to make. The Italian Meringue Buttercream icing  is another story.  You basically have to make a meringue and then add hot sugar syrup to it. After that, you cream in four sticks of butter….one tablespoon at a time.

This icing has been my albatross. It’s irking me that I have yet to nail it. When I tried making it the first time, I made the mistake of not letting my butter sit out long enough before adding it to the meringue. It ended up being a lumpy, sugary mess.

I tried to freestyle during my second attempt because I was afraid the icing might be too sweet for the cake. So instead of using the four sticks of unsalted butter that the recipe calls for, I used two sticks of salted butter and two sticks of unsalted butter. The icing came out better and tasted like buttery rum heaven. So I built the layers, iced the cake and popped it in the fridge.

Later that evening, I pulled the cake out of the fridge to taste it. The banana cake was light, fluffy and delicious. The icing however was like a shield. And it no longer tasted like buttery rum heaven. Instead, it was like eating sugary butter.

So I’ve decided to take another crack at this cake. If this icing keeps giving me hell, I’ll just use my own buttercream recipe.  Stay tuned folks!

Leave a comment »

Me and Mr. Banana Legs

I bought the CakeLove cookbook last week and I am glad I did. The book has a lot of helpful tips and great recipes. I can’t wait to try them all out. This week, I decided to tackle the Mr. Banana Legs cake. I want to make this cake for one of my best friends. My friend has fond memories of eating banana cake with her mom when she was little. And now that she has a little girl of her own, she wants to keep those memories alive and that tradition going.

It was my honor to take on this challenge. Baking is one of the things that I truly enjoy. It’s a wonderful thing to mix some flour, sugar and butter in a bowl, throw it all in a pan and pull something great out of the oven. But it’s even better when you share the fruits of your labor with others and put smiles on their faces. If I can make this cake successfully and give my friend something that is close to what she had when she was little, I will be very proud of myself.

So me and Mr. Banana Legs will duke it out in the next few days. I will fill you all in on the final results later this week.

1 Comment »